Alec W. has been in touch about a project he has been working on. It is slightly unusual, but shows the ingenuity model engineers have when faced with challenges in the construction of our models:

First Attempt
‘A few years ago whilst making small valves for the 9F I needed to create 1/8” square holes in some brass washers so decided to make a broach. Unlike the normal push broaches I thought that I would copy a machine I used as an apprentice with the Hunslet Engine Company but on a much smaller scale. I could not obtain 1/8” square silver steel so turned up a blank from suitable round stock and after forming the lead-in and cutting the many grooves milled the tapered square form necessary to produce the required holes. I repeated the exercise for a 3/32” broach ( just in case I might need one!) then hardened and tempered the two broaches to straw. Using a piece of “U” section as a base made the little machine or puller pictured below, crude but effective and it did the job.
During this ‘superb workshop isolation’ period, obtaining materials is proving to be a slow process, so decided to get on with designing and building a reversing gearbox for the engine (locomotor) currently under construction.
Dog Clutch & hubs
The dog clutch required to change from forward to reverse had been completed but I needed to find some way round the normal splined shaft for the sliding dog, a single keyway was discounted as it would be beyond my accuracy capabilities. A square shaft was the answer, I had lots of spare 1/2” drive sockets. But after turning one down with the intention of locktiting it as a bush in the dog, I discovered that there was far too much play when tried with 1/2” BMS. Filing out might work but the corners would have to be rounded and at 1/2” thick would not be easy to get a good sliding fit with no play. Once again a broach would be the answer. BMS could be used and case hardened but would it work and how could I get over 12” up to cherry red and how much hardening compound would I need? Plus it would almost certainly distort in the process.
It was at this point that a blinding flashing light occurred, I could use key steel which is very accurate, has sharp corners and being a medium carbon steel (en8)would harden. The shaft could also be made of the same and would be a proper fit.

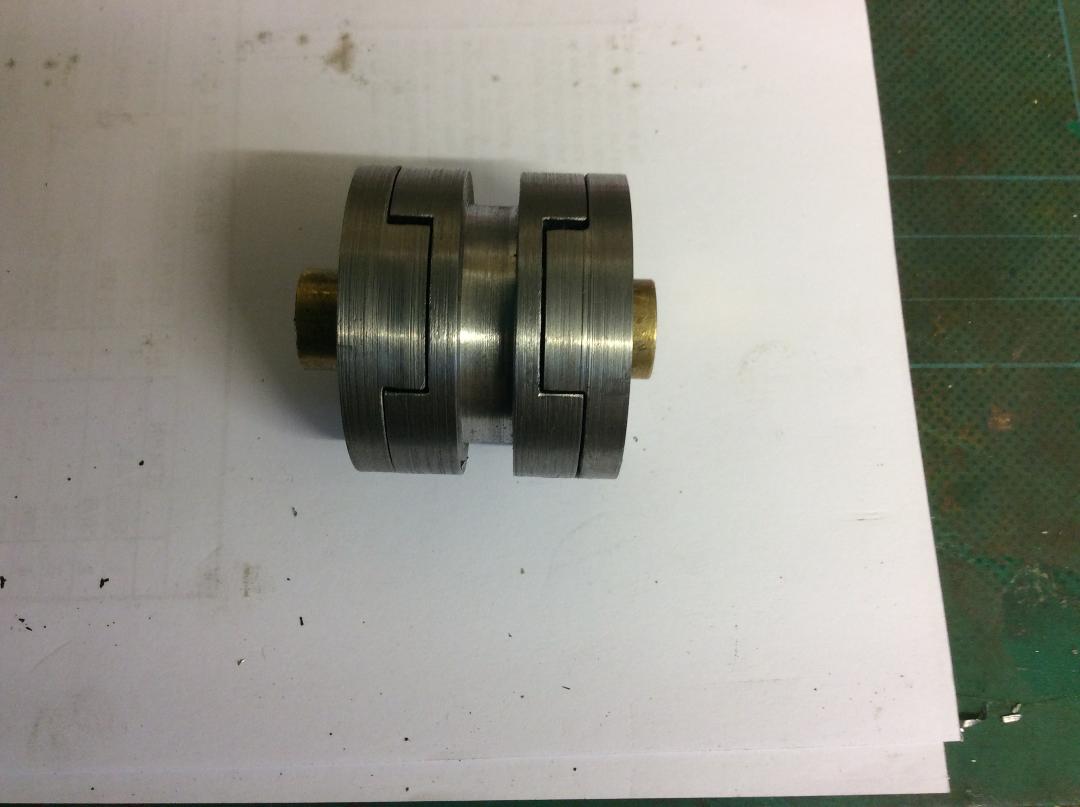
Puller Parts
This time the broach would be made from square stock so should only be a plain turning job. However the 1/2” square key steel would not go through the headstock so had to be centred in the 4 jaw at the chuck end as far in as possible with about 9” sticking out and then ‘tapped’ until the outer end was true. With all stationary and centred, a hard centre was placed in the tailstock and rammed into the end of the Bar to form a centre pop. A small centre drill was used and the chuck turned by hand until I felt a big enough centre had been formed for the lathe to be powered up and the end properly centre drilled and the lead turned to 1/2” with the end screw cut and die finished.
The 41 grooves could now be cut with the embryo broach between 4 jaw and tailstock centre. Ignoring the first groove and with the cross slide set over 3 degrees each tooth was then turned down from the round increasing each time by 1/40th of the difference between the round diameter and the across corners dimension, with the last 4” or so moved out and held in the chuck by about 1/2”.
I then had to heat the12” long broach to red heat so made a temporary furnace from firebricks and used a “tar burner” propane torch which still took half an hour to get up to heat and quenched in a bucket of cold water. Hard as glass! Job done.
All I had to do now was make a puller!
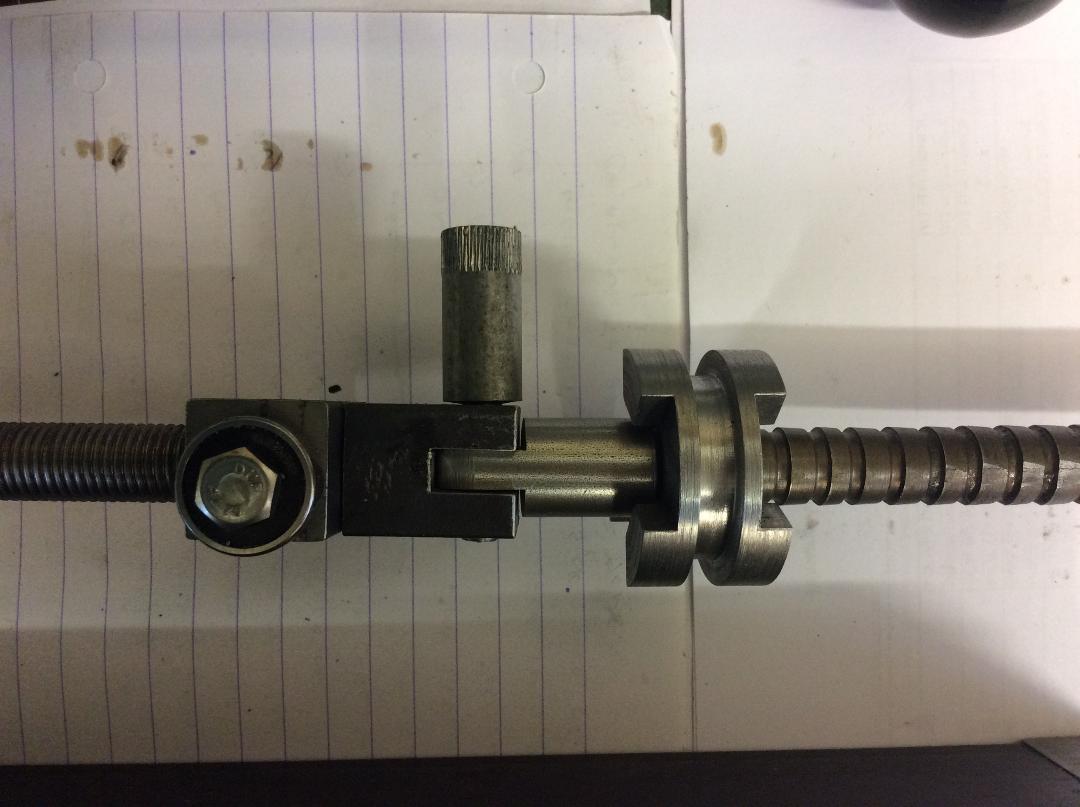 Knuckle joint between screw cut rod and broach, 2 small ball bearing races mounted either side ensure an even pull with very little friction and serve as an anti rotation device instead of the two round rods used on the mini puller.
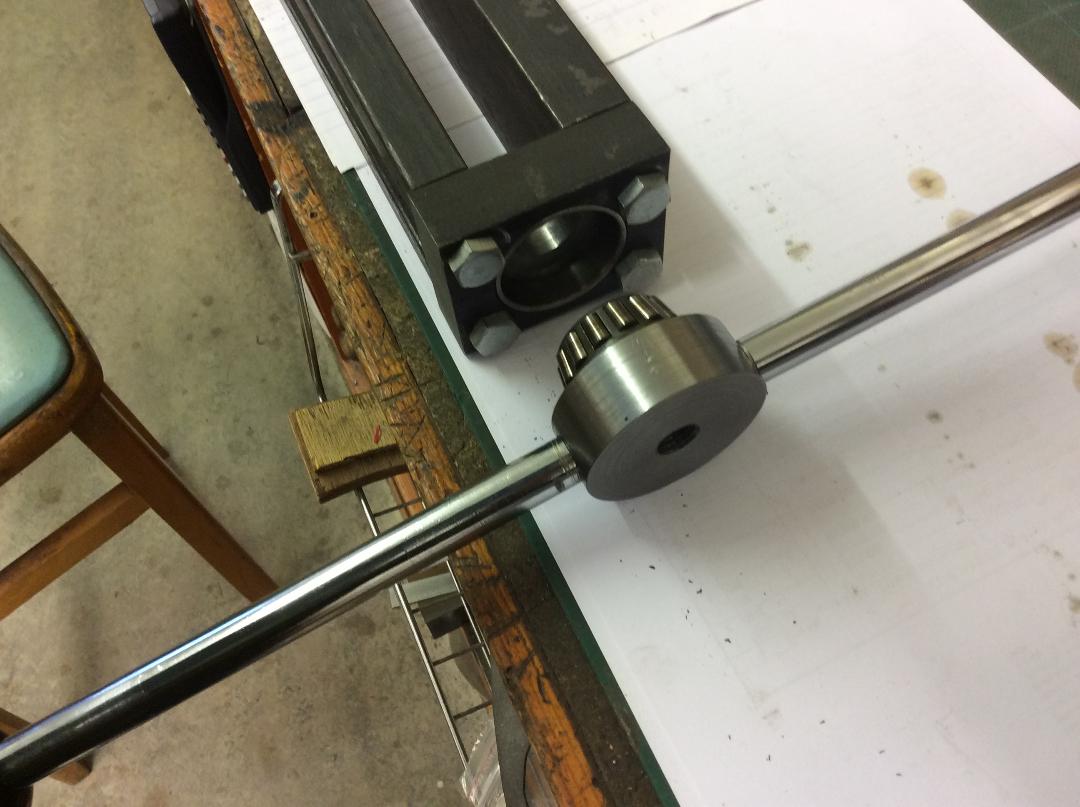 Puller nut with extended handles and thrust bearing inner locktited in position. Ready to go!
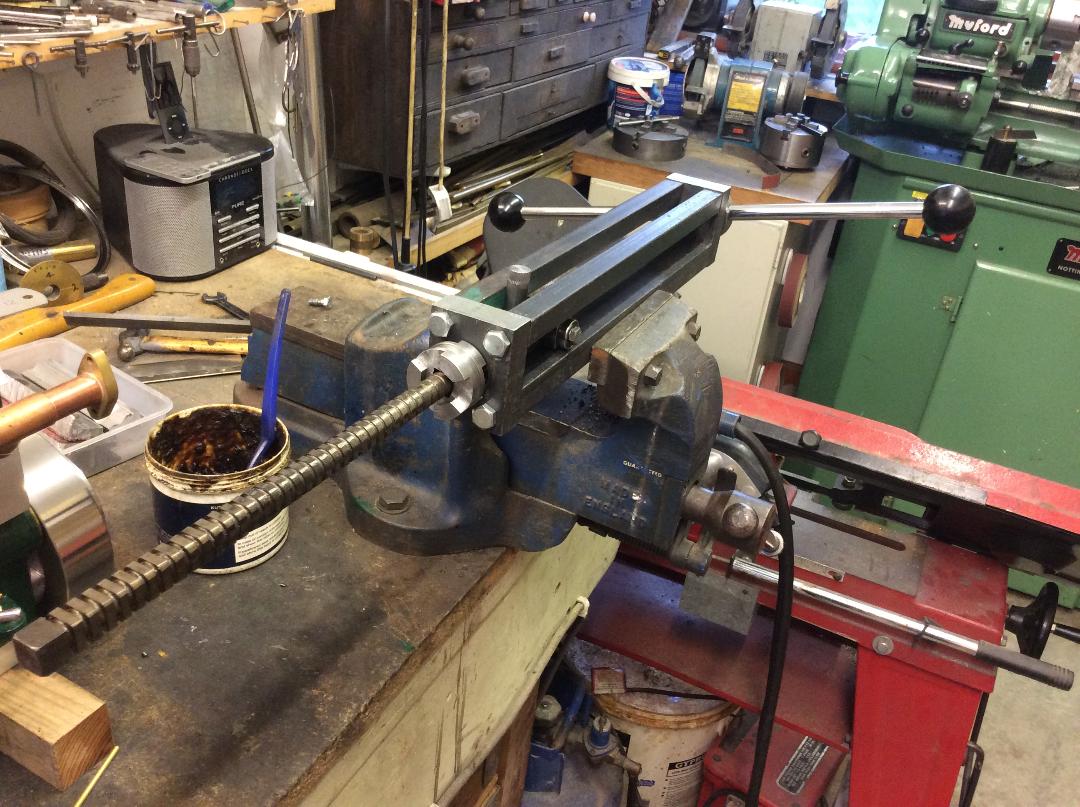 Incidentally, the picture showing the puller in the vice was taken with the dog already finished as I forgot to take it when actually doing the job. I was concerned that the teeth had no forward clearance/rake and would be okay for brass but may not work for steel. But because I had used a relatively fine thread for the feed screw (1/2” BSF) and a good splodge of cutting compound it went through with not nearly as much pressure as I had expected. Anyway, glad you liked it.
I just thought that the timescale, although long for just one square hole, really means that should I need to make another smaller broach I know that it will work and what material to use now.
Why don’t I just drive a generator and use traction motors, a true petrol electric? Answer, this is much more fun!
Stay safe everyone, yours, Alec.’